


Summer is not over yet! You can still enjoy a lovely pergola that not only will offer you shade from the midday sun but will also decorate your backyard nicely. You can add climbing plants such as vines to add colour and shade. Learn how to make an 8 feet cedar pergola right now! You can, of course, adjust the dimensions as well.
1. Install your posts

The posts are composed of 4 x 4 pressure columns that are cedar-sheathed. Secure the post cores with a concrete cushion with rear steel anchors. If you do not build your pergola on a pad, use longer studs and put them in the ground below the frost line.
2. Set positions and mark screw locations

3. Use 1/4 inch screws and Tapcon screws that go in 3/16 inches. Make holes with a drill

4. Hold each lead station and place the nails through the anchors in the wood

If necessary, install the posts so that they remain in place in the lead.
5. Attaching Support Bundles

Cut the four cedar support beams 2 x 6 lengthwise, use a template to mark the curved notches at the ends and cut the notches with a jigsaw. Secure the harnesses in place and verify that they are level and that the posts are holding in place. Then secure each end with four 3-inch screws.
Source:
popularmechanics.com
6. When you add the second beam of each pair, verify that they are at the top edges

Source:
popularmechanics.com
7. Add crossbeams

The 2 x 6 sleepers are notched to fit the support beams. Cut the notches with a cutting blade on the table saw or place each notch and use a jigsaw to remove the waste.
Source:
popularmechanics.com
8. Make curves

Source:
popularmechanics.com
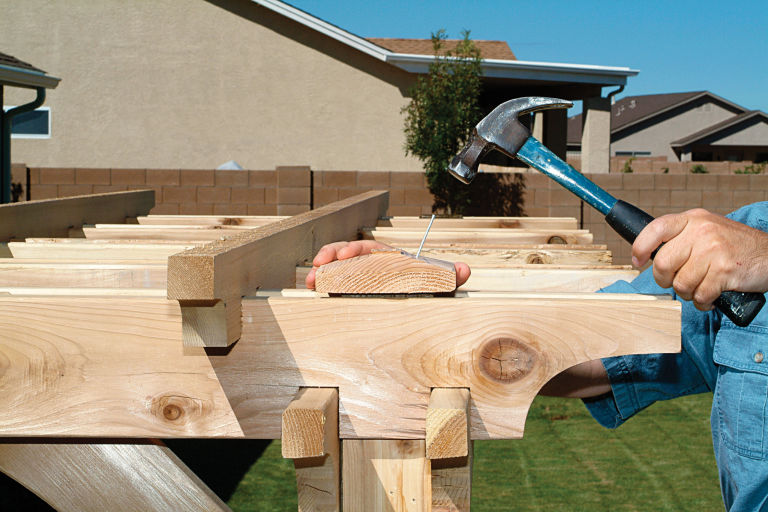
9. Install the transom pairs on the posts

When they are in place, push in the holes in their top edges and screw the cross bars onto the support beams. Then, add the remaining three pairs with a similar spacing.
Source:
popularmechanics.com
10. Fix theTrim pieces

Cut the postal trim pieces along the length and width. Note that you will need to distinguish some of the parts between the support beams or you can create filler blocks to cover the cores of the posts in those areas. Instead of trying to make impeccable corners, we sized the pad to leave a 1/8 inch. Attach trim pieces to posts with construction adhesives and galvanized finish nails.
Source:
popularmechanics.com
11. Use 2 x 6 stock for diagonal braces

Cut the ends at 45 degrees length, and use a flexible stick to arrange the shallow curve on the bottom edge of each brace. Secure the spacers to posts and beams with screws.
Source:
popularmechanics.com
12. Mounting the upper slats

Cut the five strips 2 x 4 lengthwise and shape the ends. Put each slide in place and mark the positions of the notch in the workpiece.
Source:
popularmechanics.com
13. If you use a table saw and a toothed blade to make the cuts, make sure to bear the long stock at the opposite end

Source:
popularmechanics.com
14. Then, complete the pilot holes and secure the slats with 10 3-inch screws

Source:
popularmechanics.com
15. Make the pads

To make the pads, cut the square blanks, then place the saw blade at 15 degrees to shape the bevels. Use a longer panel with a stop through the end as a sled to guide each blank into the blade. Tighten the blanks to the sled when cutting.
Source:
popularmechanics.com
16. Attach the plugs with 6d galvanized finish nails and construction adhesive
And you are all set to make your neighbours jealous with your new homemade pergola.
Source:
popularmechanics.com


